Every step, in the order you will meet it: what to do, and what can wait for later. You can do all of it on a phone.
1
Before you start
Have these to hand, or in your head: your services and what each one costs, your opening hours, the number you want customers to ring, the messaging apps you answer on, your links (Instagram, Facebook, a booking link) and a logo, if you have one. At first only your business name, your kind of work and where you work are needed: everything else can wait.
2
Start
Press Put your business in - there is one at the foot of this page. A page called Set up your website opens, with one short question on each card, and it says about 3 minutes. You do not need an account yet: what you type is kept in this browser until you make one at the end. On a laptop, a live preview of your website sits beside the cards.
3
The first five questions
Answer five questions: your business name, whether you are an individual or a company, your category, your specialty inside it, and the city or suburb you work in. Category and specialty are tapped from a list; if yours is not there, press My business is not listed and say what you do. Your street is not asked for, and every answer saves as you go.
Set up your websiteA few quick questions - about 3 minutes. All changes saved
Business nameNails by Jess
CategoryHair, Beauty & Tattoo
SpecialtyNail technician Saved
4CityWhere do you serve?
Where you work, in your own words. Your street stays off unless you add it.
Which city do you serve?Next
A simplified drawing of the first questions for Nails by Jess, an example business: three answered and folded, and the city card open.
4
The rest, if you have it
Then fill in what you have: your services, each with a fixed price, a from price or on quote; a logo and cover photo; your contact details, and whether they show; and a few lines about your business. Press Skip for now on any card you are not ready for.
Skipped a card?
If you skip Services, Logo & cover or About your business, it is not in your workspace menu until you switch it on in Add features. Opening hours are not asked for here; they come later, in your workspace.
Optional - add more when you have it
Services Optional3 services Saved
What you offer and what it costs: a set price, a from price, or on quote.
Gel full setFixed price65
InfillsStarting from45
Nail artOn quote
Skip for nowNext
+Logo & cover OptionalLogo & cover photo
Your website is ready. Finish setup
A simplified drawing of the optional cards.
5
Make your account
Press Finish setup, then Create a free account. Choose Continue with Google, or type your email, press Email me a sign-up link and open the link in that email. There is no password to make, and nothing is public yet.
Open the link where you started
Use the same phone or computer, and the same browser, you typed your answers in. If your email app opens the link in its own window, choose Open in Safari or Open in Chrome. Opened anywhere else, your answers are not there.
Nails by Jess is ready!Here it is. Make a free account to keep it. Nothing is public yet.
NNails by JessNail technician - Epping, home studio
Create a free account
A simplified drawing of the ready screen.
6
Your workspace
Your workspace opens, and from now on this is where you change anything. The side menu holds what you have so far, and Add features adds more. On a phone the side menu is folded away: tap the menu button at the top to open it.
helpfol.com/workspace
Welcome back, Jess!What's worth doing next, based on what your website already shows.4 of 6 essentials filled
Business identity Contact details Your links Your contact card Services About your business
Nothing needs your attention right now.Your website covers the essentials. You can add more from the catalog anytime. Add features
helpfol.com/workspace
Nails by Jess
Welcome back, Jess!What's worth doing next, based on what your website already shows.4 of 6 essentials filled
Business identity Contact details Your links Your contact card Services About your business
Nothing needs your attention right now.Your website covers the essentials. You can add more from the catalog anytime. Add features
A simplified drawing of the workspace, with its menu. On a phone the menu is folded away behind the button at the top left.
7
Opening hours
Open Add features and switch Opening hours on. Open it, press Edit details and pick each day's times; split shifts work, and you can copy one day's hours to others. Mark the days you are closed under Special days & holidays, then press Save changes. On a phone, your website then shows whether you are open right now, once your number is on it too.
While you are closed
Call steps back from your website and your card. To keep it, open Change how it looks on the Opening hours page and switch on Show Call anyway while I'm closed.
helpfol.com/workspace
Add featuresTurn on what your business needs. Everything you fill in stays saved, even while a feature is off.
Opening hoursSo customers know when you are open before they visit.
Brand and DesignSo everything you put out looks and sounds like you.
Contact formSo visitors can reach you from your website - and no message gets lost.
CustomersSo the people you serve are remembered in one place.
helpfol.com/workspace
Add features
Add featuresTurn on what your business needs. Everything you fill in stays saved, even while a feature is off.
Opening hoursSo customers know when you are open before they visit.
Brand and DesignSo everything you put out looks and sounds like you.
Contact formSo visitors can reach you from your website - and no message gets lost.
CustomersSo the people you serve are remembered in one place.
A simplified drawing of Add features, with Opening hours just switched on.
Thursday's closing time changed and saved, then the foot of the site on a phone: the open-now line in its bar reads the new time within seconds.Nails by Jess, an example business
helpfol.com/workspace
Opening hours
Opening hoursWeekly schedule
Thu9:00 AM8:00 PM
You have unsaved changesSave changes
InfillsFrom $45
Nail artPrice on quote
Open now, until 20:00
Call WhatsApp
Thursday changed to 8:00 PM, then Save changes. The bar at the foot of the site now says until 20:00. Simplified drawings of an example business.
8
How people reach you
Check Contact details: your email, phone, website and address. Then open Messaging apps and add the ones you answer on, in your order: WhatsApp, Telegram, Messenger, Signal, LINE, Zalo or SMS. The first one becomes the message button on your website and your card. For WhatsApp and SMS you can also write a starter message, so the chat opens with it ready to send.
helpfol.com/workspace
Messaging appsThe apps people can message you on. The first one is your message button, on your website and your card.
WhatsApp
SMS
Starter messageHi Jess, how much for a full set?
Saved. Live on your website and your card.
helpfol.com/workspace
Messaging apps
Messaging appsThe apps people can message you on. The first one is your message button, on your website and your card.
WhatsApp
SMS
Starter messageHi Jess, how much for a full set?
Saved. Live on your website and your card.
A simplified drawing of the messaging apps screen.
9
Your links
Open Your links and paste them one at a time: your Instagram, your Facebook page, a booking link, anything. Before it saves, it tells you in plain words what it understood, and takes any tracking tail off the end. Put them in your order, and they show on your website, on your card and as QR codes on your phone.
helpfol.com/workspace
Your linksinstagram.com/nailsbyjess?igsh=a81kx2
Instagram - @nailsbyjessinstagram.com/nailsbyjess
Instagram@nailsbyjess
Booking pagebookings.example/nailsbyjess
TikTok@nailsbyjess
helpfol.com/workspace
Your links
Your linksinstagram.com/nailsbyjess?igsh=a81kx2
Instagram - @nailsbyjessinstagram.com/nailsbyjess
Instagram@nailsbyjess
Booking pagebookings.example/nailsbyjess
TikTok@nailsbyjess
A simplified drawing of Your links.
10
Look and feel
Open Brand and Design (if it is not in your menu, switch it on in Add features). Add a logo and a cover photo if you have them, and pick your colours: with a logo, colours are suggested from it, and with none, your first letter stands in for it. These choices save themselves. For the layout, the corners and the spacing, open Appearance, under Add features in the side menu.
helpfol.com/workspace
Brand and Design
NLogo
helpfol.com/workspace
Brand and Design
Brand and Design
NLogo
A simplified drawing of Brand and Design.
11
The message form (optional)
If you want people to write to you from your website, open Add features and switch Contact form on, then choose whether each message is emailed to you or kept in your workspace only. Messages land in your Inbox, and the people writing do not need an account.
helpfol.com/workspace
Add featuresTurn on what your business needs. Everything you fill in stays saved, even while a feature is off.
Opening hoursSo customers know when you are open before they visit.
Brand and DesignSo everything you put out looks and sounds like you.
Contact formSo visitors can reach you from your website - and no message gets lost.
CustomersSo the people you serve are remembered in one place.
helpfol.com/workspace
Add features
Add featuresTurn on what your business needs. Everything you fill in stays saved, even while a feature is off.
Opening hoursSo customers know when you are open before they visit.
Brand and DesignSo everything you put out looks and sounds like you.
Contact formSo visitors can reach you from your website - and no message gets lost.
CustomersSo the people you serve are remembered in one place.
A simplified drawing of Add features, with Opening hours and Brand and Design on, and the Contact form just switched on.
12
Other languages (optional)
If some of your customers read Persian or Chinese, add the language: open Settings, in the menu under your name at the foot of the side menu, then Edit Languages. Your hours, prices and number are shared, and you write the words in each language yourself. Each language is published on its own, and Helpfol never translates your words on its own.
13
Publish
In the side menu, open Where people find you, then Your website. Your website's address is near the top, with a copy button, and under it is a row for each language. Switch the row from Draft to Published: it is public from that moment.
No preview of your whole website yet
Change how it looks previews one part at a time, but your workspace shows your whole website only once it is published; then View your website, at the top, opens it the way a visitor sees it. If something looks wrong, switch the row back to Draft and it is private again.
In Helpfol's lists, too
Once it is published, Helpfol's lists by trade and area link to your website, next to other businesses. Nothing there scores you, and no spot is for sale. To stay out of them, switch off Link to my site from Helpfol Find on Where people find you.
helpfol.com/workspace
View your websiteYour websitePublish it, in each language you wrote it in.Switch a language version to Published and it goes public. Drafts stay private.Your website's address:
helpfol.com/l/nails-by-jess/
EnglishPublished
helpfol.com/workspace
Your website
Your websitePublish it, in each language you wrote it in.Switch a language version to Published and it goes public. Drafts stay private.Your website's address:
helpfol.com/l/nails-by-jess/
EnglishPublished
A simplified drawing of Your website, opened from Where people find you in the side menu (on a phone, the side menu is behind the menu button at the top left).
14
Your contact card
Open Your contact card. Its address is helpfol.com/@ and the name in your website's address. Press Make my card; to give it a short name of your own, press Change beside the address once it is made. People you hand it to can tap Add to contacts, and your number is in their phone, with your card's address.
helpfolhelpfol.com/@nailsbyjess
JWJess WalkerNail tech Epping, home studio Open now, until 18:00
Simplified drawings of the card, and of the Your contact card screen.
15
Your QR codes, on your phone
On your phone, open Your deck, press Open my deck, then Show me how to add it to my home screen and follow the steps for iPhone or Android. Your QR codes are then one tap away, even with no signal.
Set up on a laptop?
There, Your deck shows a code instead: point your phone's camera at it and the deck opens on your phone. To keep it there, sign in on your phone and follow the steps above.
Nails by JessPrices and opening timeshelpfol.com/l/nails-by-jess/
helpfol.com/workspace
Your deckThe QR codes you hold up when you are standing in front of somebody: your website, your card, and the links you keep in Your links. Open it on your phone once and keep it there.
Point your phone at thisOr send yourself the link. Either way, it is the same deck.
Your deck link
Copy
Open my deck and see what they see
What your deck shows
Your websitehelpfol.com/l/nails-by-jess
Your cardhelpfol.com/@nailsbyjess
Message me on WhatsAppWhatsApp
Instagram
helpfol.com/workspace
Your deck
Your deckThe QR codes you hold up when you are standing in front of somebody: your website, your card, and the links you keep in Your links. Open it on your phone once and keep it there.
Open my deck Show me how to add it to my home screen
What your deck shows
Your websitehelpfol.com/l/nails-by-jess
Your cardhelpfol.com/@nailsbyjess
Message me on WhatsAppWhatsApp
Instagram
Simplified drawings of your deck on a phone, and of the Your deck screen: on a laptop it shows the code; on a phone, Open my deck.
16
Hand it out
Paste your website's address into your Instagram or TikTok bio, put it under your name in your emails, and send it in a text when someone asks. When someone wants your number, hold up your QR code, or open your card and let them tap Add to contacts. Everyone you hand it to sees what you last saved.
It does not bring people to you
You hand it out yourself, and whoever you hand it to sees the right number, the right price and today's hours.
.../nails-by-jess/In your bioWhere 'DM for prices' used to be
all here x helpfol.com/l/...In a textFrom the couch at 10 pm
On your phoneHold up the QR code
JWJessNails by JessIn their contactsSaved from your card, with its address
helpfol.com/l/...Under your nameIn an email, or at the foot of a quote
helpfol.com/l/nails-by-jess/
N
Nails by JessGel nails and BIABNail technician - Epping, home studio
Services
Gel full set$65
InfillsFrom $45
Nail artPrice on quote
Find me
Instagram@nailsbyjess
Booking pagebookings.example/nailsbyjess
TikTok@nailsbyjess
Open now, until 18:00
Call WhatsApp
.../nails-by-jess/In your bioWhere 'DM for prices' used to be
all here x helpfol.com/l/...In a textFrom the couch at 10 pm
On your phoneHold up the QR code
JWJessNails by JessIn their contactsSaved from your card, with its address
helpfol.com/l/...Under your nameIn an email, or at the foot of a quote
helpfol.com/l/nails-by-jess/
N
Nails by JessGel nails and BIABNail technician - Epping, home studio
Services
Gel full set$65
InfillsFrom $45
Nail artPrice on quote
Find me
Instagram@nailsbyjess
Booking pagebookings.example/nailsbyjess
TikTok@nailsbyjess
Open now, until 18:00
Call WhatsApp
17
Change it later
Change your services or your hours any time: open them, press Edit details, change them and press Save changes. Contact details, messaging apps, colours and layout save as you go. Your website has it within seconds, with no second publish, and your card follows. Your QR codes stay the same, because they point at your addresses, not at your details.
InfillsFrom $45
Nail artPrice on quote
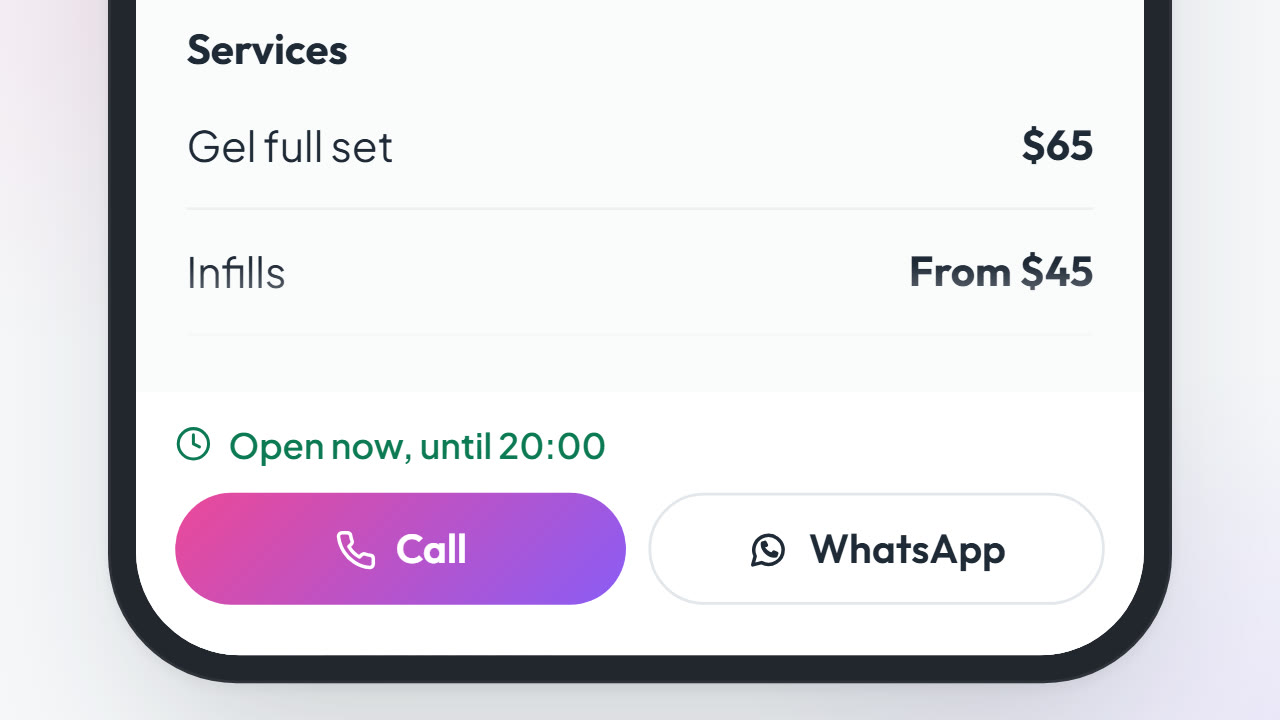
Open now, until 20:00
Call WhatsApp
A simplified drawing of the foot of the example site on a phone, once Thursday runs to 20:00.
18
What it cannot do yet
Bookings. Your booking link can sit in your links.
Showing you visitors or taps.
A preview of your whole website in your workspace before you publish. Each part's Change how it looks previews that part, and while you set up on a laptop, a live preview sits beside the cards.
More than one login. Only you sign in, and the card is yours.
Your ABN or a licence number on your site. They are kept in your workspace.
A printable sign, or a QR code file to print. For now your QR codes are on your phone.
An export of your details. Keep your own copy of your price list.
Your custom website, your own domain name and a business email. Coming, and not priced yet.
If any of that matters to you, it is better to know now than halfway through.
It asks for what you already know: your business name, what you do and where you work, then as much as you have of your services, prices and how to reach you. Your hours go in afterwards, in your workspace. Nothing goes public until you publish it. You can change every line afterwards, from your phone.